
Turn 1
The rear-guard action starts with both von Werneck and
Marmont issuing orders to their ADCs to be passed on to the division and
brigade commanders. Marmont focuses on calling up his artillery and ordering
his 1st Infantry Division to assault the Austrian grenadiers to
their front. Von Werneck orders some of his ADCs to seek out General Mack while
the rest of his ADCs hurry to issue orders to the grenadiers facing the French
advance. Word quickly comes back to Marmont that the II Corps Artillery is
moving up and will arrive on the field shortly and that the infantry assault of
the 1st Division will commence immediately. Much to Marmont’s
frustration, General of Division d’Hautpoul commander of the Cavalry Reserve,
seems to have only ordered one of his two brigades forward, instead of moving
the entire division forward as was ordered. This will slow down the planned
French attack on the Austrian center.
Von Werneck does not fare much better, as no word seems to
have come back from the ADCs about the status of General Mack’s reinforcements.
There is also some hesitation in a few of brigade commanders on the field due
to the situation at hand, causing a delay in the withdrawal of the Austrian 3rd
Infantry Division towards the Danube River.
Following his newly arrived orders from Marmont’s ADC,
General de Brigade Soyez commander of the 2nd Brigade in the French
II Corps 1st Infantry Division orders his battalions to charge the
opposing Austrian Grenadiers. The 2nd Battalion of the 35th
Line and the 1st Battalion of the 11th Line lead the
charge with the remaining two battalions in the brigade lending support to the
attack. As the assaulting battalions clear the brigade’s skirmisher screen the
waiting Austrian grenadiers fire off volleys of well-coordinated musketry into
the advancing French columns. The result is devastating on the already worn-out
battalions of Soyez’s brigade and the attacking battalions break instantly
under the brutal fire causing panic in the entire brigade. The attempt to
quickly brush aside the exhausted Austrian grenadiers has failed for the moment
and Soyez is forced to try and rally his brigade to avoid a general route of
his two regiments.

Figure 1
- Austrian Grenadiers Hold off the French Assault.

Figure 2
- The Austrian Grenadiers Finally Live up to Their Reputation.

Figure 3
- Aftermath of the Failed French Infantry Assault.
Over on the Austrian right flank, the Colonel of the French 8th Chasseurs takes advantage of a possible opening to hit the Austrian 3rd Infantry Division in the flank. The charging light cavalry fails to catch the Austrian infantry by surprise and the Austrian 2nd Battalion of the #11 Line regiment manages to form square just before the charging French Chasseurs hit the battalion. Subsequently the French cavalry is forced to fall back and regroup before they can try again. For this charge in hindsight, I am pretty sure that I messed up the results and did not adequately take the impact of the flank attack into account since my brain was thinking how do you hit the flank of the square at the time? Not thinking that concept was that the battalion was being charge from the flank while in line and therefore should have had penalties throughout the resulting rolls.

Figure 4 - Charge of the 8th Chasseurs a Cheval.
As these charges were underway, the French 1st
Brigade of the Cavalry Reserve under the command of Colonel Noirot began moving
forward to exploit the gap in the Austrian lines. General of Brigade Dessaix
commanding the 1st Brigade in the French II Corps 1st
Division also began deploying his 18th Light Regiment to take over
where the 2nd Brigade had just failed in their attack on the
Austrian grenadiers.

Figure 5
- French Cavalry Advances.
To counter the French charges and deployments, von Werneck
orders that the 4th Infantry Division’s 2nd Brigade under
the command of Oberst Frohauff to about face and occupy the town of Heidenheim,
in order to hold open a route by which the Austrian 3rd Infantry
Division can withdraw towards the Danube River.

Figure 6
- Austrian Grenadiers Begin Occupying Heidenheim.
To plug the gap in the Austrian lines, General-Major
Weissenwolf commander of the 2nd Brigade in the Austrian 2nd
Cavalry Division, orders his squadrons of the #2 Dragoon Regiment (the
Hohenlohe Regiment) to deploy into the fields blocking the advance of the
French Cuirassiers. The Dragoons remain close to the town of Heidenheim so as
to force an attacker to come into range of the guns of the defending Austrian
grenadiers.

Figure 7
- Austrian Dragoons Deploy in the Farm Fields outside of Heidenheim
Over on the Austrian right, after repulsing the French cavalry charge, General-Major von Lindenau begins order his Austrian 3rd Infantry Division to disengage and withdraw towards the Danube. Unengaged battalions in the rear of the Division’s lines form column and about face to begin their withdrawal.

Figure 8
- Austrian 3rd Infantry Division Begins to Withdraw.
The ever-present sound of musketry fire picks up in
intensity as both side open fire with volleys of fire into one another. The
fire from the 2nd Brigade of the French II Corps 1st
Division is ragged and uncoordinated due to their recent repulse at the hands
of the Austrian grenadiers. Fire from the French 18th Light does
eventually force one battalion of Austrian grenadiers to disperse.

Figure 9
- Overview of the Musket Fire.
Infantry of the French 18th Light Regiment open
fire on the Austrian Dragoons that are stationed north of Heidenheim.
Taking advantage of the rare opportunity for infantry in line to fire upon
cavalry. This may not be the case in for much longer.

Figure 10
- Opportunistic French Infantry Fire into Waiting Austrian Cavalry.
To the north, the French focus fire on the square formed by
the 2nd Battalion of the Austrian #11th Line Infantry
Regiment as a result of the earlier charge by the French Chasseurs. This
Austrian battalion was already worn out from the days fighting and soon
disperses from the field under the pressure of French skirmisher and volley
fire.

Figure 11
- The Effects of the French Cavalry Charge Cause Problems for the Austrians.
This broken battalion leaves a gap in the Austrian 3rd
Infantry Division line that could be exploited by the French to attack the
withdrawing Austrian infantry battalions in the rear. General-Major von
Lindenau will be forced to re-route withdrawing battalions to prevent a French
breakthrough.

Figure 12
- A Hole Opens in the Austrian 3rd Infantry Division Line.
Turn 2
At the start of turn 2, the French II Corps artillery
finishes moving onto the field and deploying their guns. Two batteries of guns
deploy on the high ground behind the French 1st Infantry Division
while a third battery deploys near Napoleon’s headquarters.
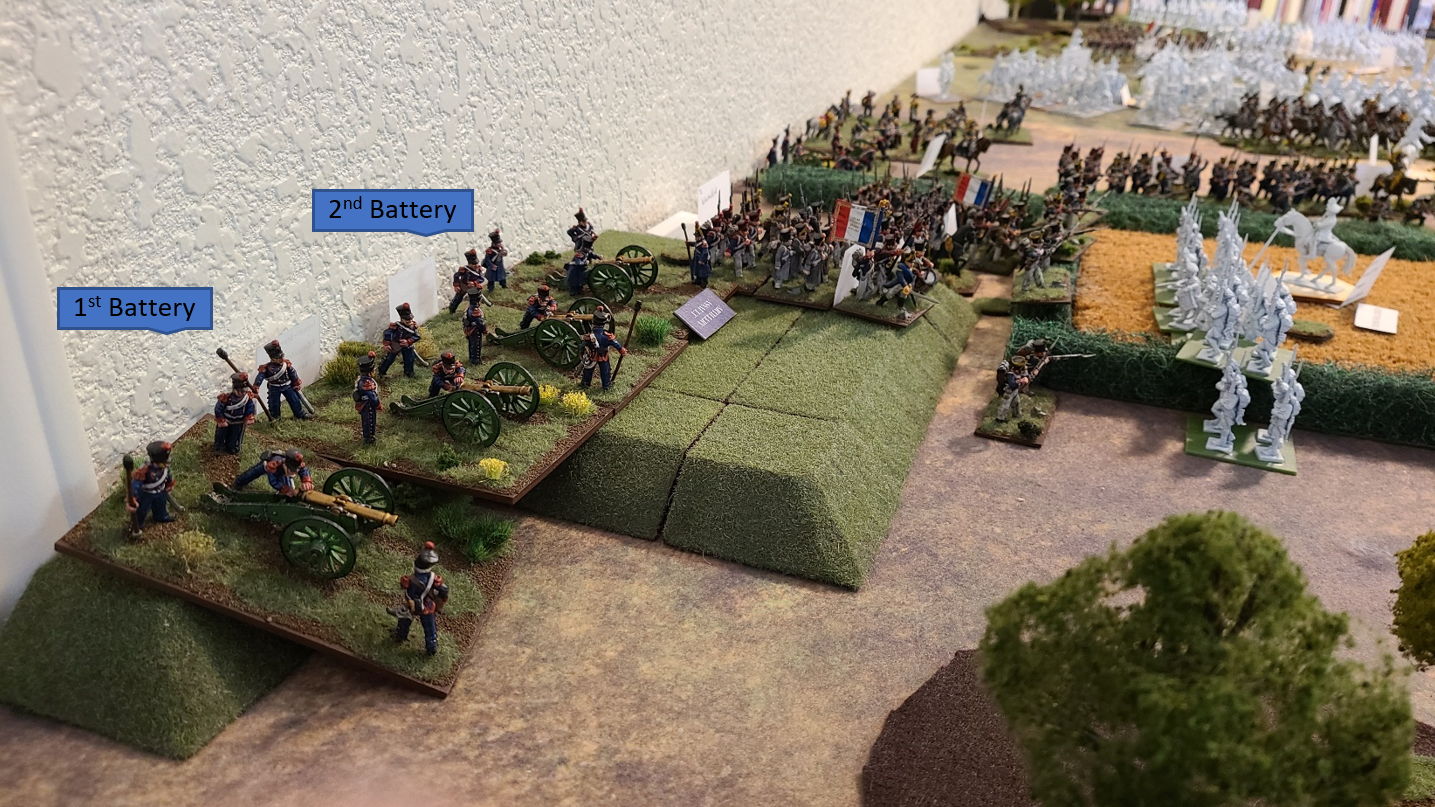
Figure 13
- French Artillery Enters the Battle.

Figure 14
- The French Rally for Another Push Against the Austrian Grenadiers.
Marshal Marmont sends his ADCs to issue orders that the
artillery should begin targeting the Austrian infantry and cavalry deployed
outside of Heidenheim. Further ADCs are sent to try and get all of General
of Division d'Hautpoul’s Cavalry Reserve Division on the move. Von Werneck
tries again to see if his ADCs can make contact with General Mack, but they
prove unsuccessful again, the rest of his aides rush across the battlefield
attempting to help motivate the Austrian troops in their withdrawal from the
field.
Primary among the orders that the Austrian ADCs are rushing
across the field, is the order to charge down the advancing battalions of the
French 18th Light Infantry Regiment. The 1st and 2nd
squadrons of the #1 Dragoons, the Archduke John Dragoons, charge at the
advancing 1st Battalion of the French 18th Light Infantry
Regiment. This elite infantry unit is able to quickly form square and force the
attacking Austrian Dragoons to withdraw into Heidenheim.

Figure 15 - Austrian Dragoons Charge French Infantry in Square.

Figure 16
– Remaining Austrian Dragoons Wheel to Make Further Charges.
The 1st Brigade of the French Cavalry Reserve is
still the only elements of d'Hautpoul’s Division that is on the advance causing
further consternation in the on looking Napoleon and Marmont. Colonel Noirot,
the 1st brigade commander of the Cavalry Reserve, orders his
Cuirassiers to begin to spread out preparing for a charge against the awaiting
Austrian Dragoons. He plans to charge the Austrians with or without support
from the rest of the division. The Colonel may get a promotion to General of
Brigade after this battle.

Figure 17
- French Heavy Cavalry Deploys.
Moving up behind the French heavy cavalry, the Chasseurs and
Hussars of the French II Corps Cavalry Division prepare to charge into the
ranks of the Austrians infantry once more while battalions of the French 2nd
Infantry Division move forward to exploit the gap left in the Austrian lines
caused by their musket fire.

Figure 18
- French II Corps Cavalry Division Advances.

Figure 19
- French Skirmishers Advance upon the Austrian Line Ahead of French Battalions.
Major-General von Mayer commander of the Austrian 2nd
Brigade in the 3rd Infantry Division attempts to block this move
from the French by ordering another one of his battalions to plug the gap in
the Austrian lines. The entire Division may be forced to turn and fight the
French if they cannot disengage soon.

Figure 20
- Austrian Battalions on the Move.
The artillery of the French II Corps booms across the
battlefield as the gunners let loose with their first volley of fire signaling the
start of renewed French attacks.


Figure 22
- Austrian Grenadiers are Overwhelmed by Musket Fire.
To the north of the battlefield, both the French and
Austrian lines are obscured by the volume of fire that both sides unleash at
each other. Both sides take casualties, but the lines stand firm under fire.
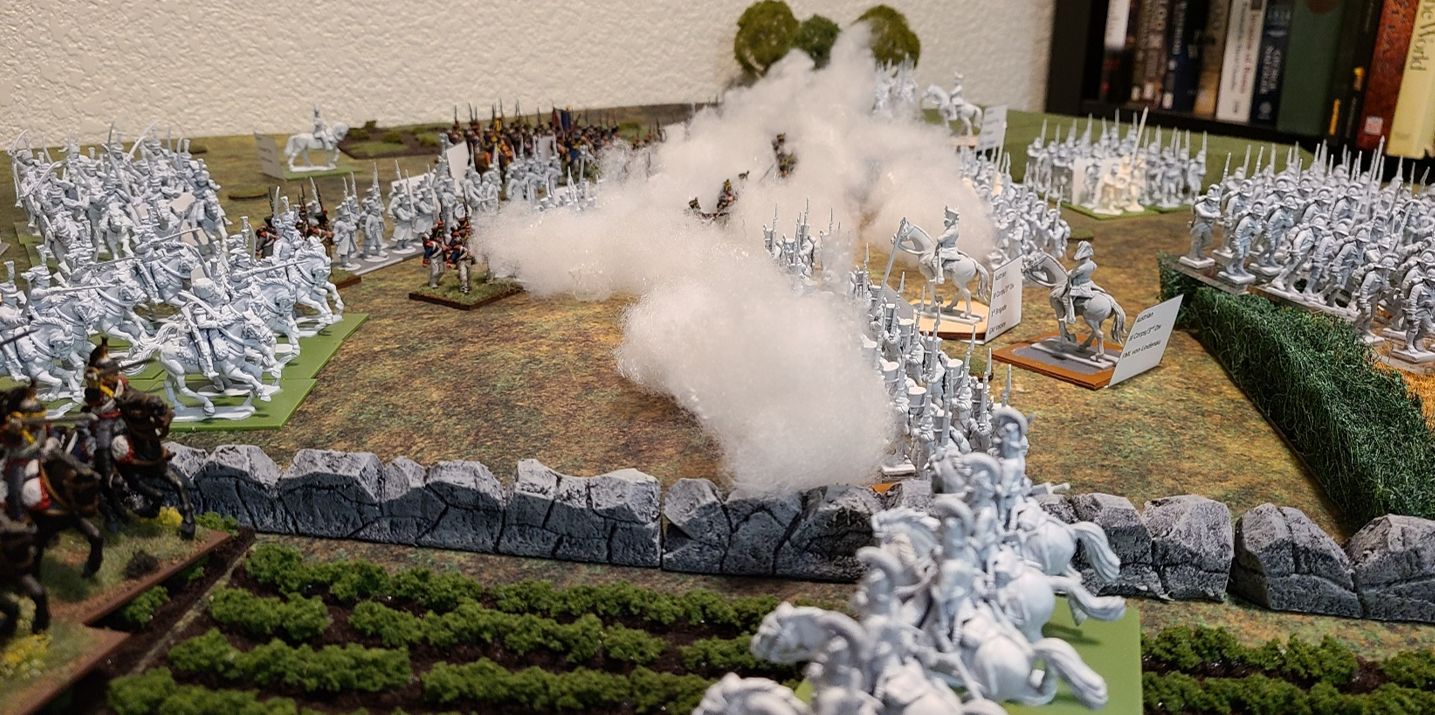
Figure 23
- Continuing Clash in the North.
The situation is looking dire as the Austrians have had
their first brigade break and flee the field, leaving only the grenadiers in
the town of Heidenheim and the Austrian Dragoons left to protect the
bridge across the Danube River.

Figure 24 - Overview of the End of Turn 2.
No comments:
Post a Comment