
(Note for any of my readers. I write these reports on a word processor and then move them on to my blog because I find it an easer task to conceptualize the structure of what I am writing. Recently I had to change word processors and so some of the style might have changed because of this.)
Battle 2 – During Turn 7 of the Campaign, late afternoon.
Attacker: French
Objectives: Take the town of Donauworth. Capture or destroy as many Austrian units as possible
Defender: Austrians
Objectives: Withdraw from the battlefield with more than 50% (three brigades) of remaining troops intact.
Battle End conditions: 50% (three brigades)or more of the remaining Austrian brigades are routed off the field or after 12 turns (I consider that by turn 12 night will have fallen on the battlefield. This is something that I did not make clear in the last battle report).

This battle takes place immediately after the end of Battle 1 – The Battle of Donauworth & Heidenheim, that was fought using the Blucher rules. At the start of this battle portions of both the French and Austrian armies are engaged in combat based upon where the previous battle ended. The French are still attempting to capture the town of Donauworth and destroy as many Austrian units as possible while the Austrians are attempting to withdraw from the battlefield. Some of the effects of the Rear-Guard battle at Heidenheim will affect events in this battle.
Reinforcements
For this battle, only the French have possible reinforcements. These are in the form of the French III Corps artillery park that is still marching to the battle and the off-table forces of the French III Corps 1st Infantry Division. The same rules for calling in marching reinforcements will be used from the previous battle, but since Napoleon had issued orders for Davout to send is 1st Infantry Division to Heidenheim, Davout will not be able to make use of his last division of infantry until after turn 3 of this game. This is because the rear-guard action at Heidenheim ended at turn 3, so word should reach Davout by the end of 3 of the conclusion of events, thereby releasing the use of the 1st Infantry Division for Davout to use locally.
Order of Battle – French
French units currently on the field, unless stated otherwise. The numbered grids next to each battalion indicate the number of casualties currently held by the battalion based upon the effects of the first part of the battle.


French off table reinforcements. French off table reinforcements have accrued casualties via exhaustion due to forced marches.

French marching reinforcements.

Order of Battle – Austrians
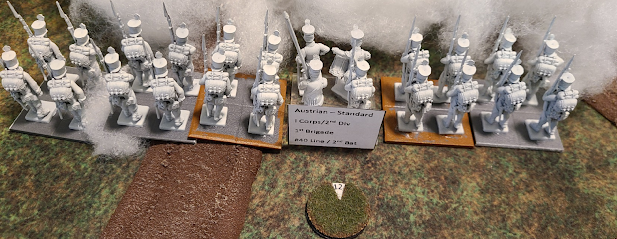
Austrian units currently on the field, unless stated otherwise.


Battlefield Overview

Unlike von Werneck to the north, Fieldmarshal-Lieutenant Franjo Jellačić’s withdrawal from the battlefield has had more success up to this point. Jellačić’s forces are starting in a strong defensive ring around the town of Donauworth. The Austrian I Corps, 1st Infantry Division under Feldmarschall-Leutnant von Brady have occupied the town and are currently the first troops that will be withdrawing across the Danube River.

Jellačić Issuing Orders from Donauworth.
1st Brigade of the Austrian 1st Division withdrawing through Donauworth

2nd Brigade of the Austrian 1st Division hold the Northern Approaches to Donauworth
The infantry and Grenadiers of the 2nd Division under Feldmarschall-Leutnant von Treuenfels are deployed in a forward position that will enable them to engage any approaching French reinforcements outside of the town or aid in blocking any cavalry charges towards Austrian troops as they withdraw through Donauworth.

The Grenadier Brigade Deployed outside of Donauworth with the 1st Brigade 2nd Division in the Background.
Towards the south, the nature of the ground is very favorable to the Austrians cavalry of Feldmarschall-Leutnant Graf Fresnel, as the hedges and stone walls will force the opposing French light cavalry to fight as isolated units in a bottle necked situations as they attempt to engage the Austrian cavalry.

Austrian Cavalry Defending the Approaches to Donauworth from the French.
For Marshal Davout, this battle is going to be an exercise in aggressive caution. Davout’s opponent is not beaten or worn down enough to allow a French assault to easily roll up the Austrian opposition. Davout is also limited in what actions he can take at the moment since he only has one infantry division and one cavalry division available to continue the pursuit of the Austrian forces. To the north the worn out French III Corps, 2nd Infantry Division under the command of General of Division Friant is continuing his pursuit of the Austrians into Donauworth. Friant has three brigades at his disposal, but his largest and best two brigades are very worn out from the days fighting so far. His smaller 3rd brigade is in better shape, but they are currently acting as a reserve for the entire division.

2nd Infantry Division of the French III Corps Initial Deployment

1st Brigade of the 2nd French Infantry Division Marching past the Farmhouse

Marshal Davout Handing Out Orders to His ADCs From the Nearby Farmhouse.
To the south, the French III Corps Cavalry Division is under the command of General of Brigade Viallanes. In one of those strange organizational quirks of the Napoleonic era, Viallanes is commanding a division size cavalry force without the normal brigade command structure, which means that he does not have designated brigade commanders under him. This will make command and control of his three regiments of Chasseurs and one regiment of Hussars more challenging in the fighting to come.
Viallanes had made an earlier attempt to flank the Austrian forces cut off access to the Danube River crossing, but the counter moves by the Austrian cavalry commander had blocked this attempt. The French were successful in cutting the communications between Donauworth and Heidenheim, but Viallanes’ cavalry force is now split in two due to the nature of the terrain they have traversed in the attempt to encircle the Austrians.

French Cavalry Division Deployed on the Southern Side of Donauworth.
Davout’s hope at the moment is that the threat of possible French reinforcements from his remaining 1st Infantry Division will be enough to keep the Austrians from switching towards the offensive. Davout also hopes that his artillery park will arrive and begin bombarding the Austrians or supporting combined arms attacks. The arrival of French artillery would be something that would make things very difficult for the Austrians as Jellačić’s artillery was broken and routed from the field earlier in the day.
Turns 1-3
Seizing on the advantage of the French Cavalry Division being divided by the local terrain, Feldmarschall-Leutnant Graf Fresnel orders his 2nd Brigade (the #7 Chevau-léger regiment) to charge the opposing French cavalry regiments. The Austrian light cavalry squadrons crash into the 2nd Chasseurs, but the wider frontage of the French Chasseur regiment allows them to gain the upper hand. The envelopment of the Austrian flanks causes disorder in the ranks of the leading squadrons of the #7 Chevau-léger and forces a protracted melee to ensue, in which the Austrians come off worse and are forced to fallback with half the attacking forced being temporarily routed.

Austrian Cavalry Attempts to Blunt any French Cavalry Attacks Before They Can Get Under Way.

Unfortunately, the French Gain the Upper Hand Forcing Austrian Units to Rout.
As the cavalry battle picks up to the south, the Feldmarschall-Leutnant von Brady’s 1st Brigade of the Austrian 1st Infantry Division begins to cross the Danube. The four battalion brigade will need to complete its crossing of the bridge before more troops can begin crossing (It takes about 2 turns for a battalion to cross the bridge. One turn to approach the bridge and one turn to cross). Von Brady orders his 2nd Brigade to be on the alert as the French will probably take notice of this and redouble their efforts to take the town.

Feldmarschall-Leutnant von Treuenfels commanding the Austrian I Corps 2nd Infantry Division has other plans. His orders from Jellačić are to protect the Danube River crossing, but in von Treuenfels opinion, the Austrians still have a very powerful force in this area of operations and he believes that they should try and blunt as much of the French attack as possible before withdrawing across the river. To that extent, von Treuenfels orders his powerful 2nd Brigade, which is made up of converged battalions of grenadiers, to swing around and begin attacking the French 2nd Infantry Division in the flank. Von Treuenfels orders his 1st Brigade to hold their position and form some of the battalions into square so as to keep a line of retreat open for the Grenadiers should they need to withdraw.

For General of Division Friant, the orders issued to him by Marshal Davout are quite clear. The ADC informs Friant that he is to use his 1st and 2nd Brigades to continue to pressure the retreating Austrians as much as possible while Davout attempts to call up the missing French III Corps artillery and possibly some brigades from the 1st Infantry Division. As Friant begins to issue orders, reports come in of the movement of Austrian grenadiers on the flanks of the General of Brigade Heudelet’s 1st Brigade. Friant orders Heudelet’s to have some of his battalions deploy into line along the road to Donauworth so as to protect the flank of the attacking French infantry division.

Heudelet’s closets battalions that could meet the threat of Austrian Grenadiers are the worn-out battalions of the 15th Light Regiment. The very experienced 15th Light is able to quickly maneuver and shake themselves out into line formation to meet the oncoming threat as the rest of the brigade marches past.

As the 15th Light turns to face the oncoming Austrians, the rest of the French 2nd Infantry Division, a total of 8 battalions, beings their advance on the town on Donauworth. Both of the leading brigades advance in column of attack with swarms of skirmishers deployed in front to cover the movement of the attacking battalions.

As the leading elements of the French assault begins to come into range of the waiting Austrians, skirmisher fire and the occasional volley of musket fire erupts along the line. The small back and forth of skirmisher fire between the advancing French voltigeurs and the Austrian garrison in Donauworth is soon drowned out by the larger concentrated volleys of the French 15th Light engaging the attacking Austrian grenadiers.

French Skirmishers Begin to Engage the Garrison Inside Donauworth.
Coordinated fire discipline among the attacking Austrian grenadiers and French light battalions is soon lost in the din of musket fire leading to a lot of ineffectual results for the first few volleys from both sides. Both sides are suffering from either being too impetuous or being very worn out as in the case of the French infantry.

Austrian Grenadiers and French Light Infantry Exchange Fire.
For the French cavalry, General de Brigade Viallanes attempts to capitalize on having been able to force back the earlier Austrian cavalry charge. Taking advantage of this opening Viallanes orders his 2nd and 12th Chasseurs regiments to pursue the withdrawing Austrian Chevau-léger squadrons in an attempt to finish them off.
On the other side of the road linking Donauworth and Heidenheim, the commanders of the French 1st Chasseurs and 7th Hussars take their own initiative and begin closing the distance with the brigade of the #5 Chevau-léger regiment that is guarding the southern approach to the bridge. If the French can force their way to the bridge, they can cut the Austrian line of retreat in that direction and force the Austrians to retreat north which is something that Jellačić wants to avoid doing.

Even with the growing threat of French cavalry, Austrian infantry continues to hurry across the bridge. Von Brady’s 1st Brigade has almost gotten 50% of its troops across the bridge at this time. Soon von Brady will have to begin withdrawing his 2nd brigade across the river as it fights off the French attack at the same time.

For General of Division Friant, the challenge of continuing his attack grows as his battalions continue to close the distance towards Donauworth. Friant’s brigade commanders need to get their battalions into range of the town to begin their assault, but the dense farmland is hindering infantry movements causing a slow down in the advance. Friant orders that his 3rd Brigade, under General of Brigade Grandeau, should move up as well since it is taking so long for the other two brigades to get into range of their targets.

Over on the French 2nd Infantry Divisions flank things are not looking so good as a second converged battalion of Austrian Grenadiers comes into range with the French 15th Light Regiment. So far the 15th Light is holding out due to the cover afforded to them because of the hedges near the road, but it is doubtful that this will last much longer.

Seeing that the his grenadiers are not having as much success as he desired, Feldmarschall-Leutnant von Treuenfels orders one of the battalions from his 2nd brigade to move up and extend the line being created by the Austrian grenadiers. Luckily for the French, battalions from the 33rd Line Regiment are there to block this advance. The 33rd Line is part of the same brigade as the 15th Light, which combined form the 1st Brigade of the French 2nd Infantry Division. Their commander, General of Brigade Heudelet, had intended to use his 33rd Line regiment to attack Donauworth, but he is now forced to clear this obstacle before his brigade can continue to advance.

As the French attack columns get closer to Donauworth, the Austrian defenders start putting up a powerful volleys of musket fire to try and break up the French attack. French skirmishers inflict casualties as they try and cover the advancing columns and this causes chaos in the Austrian lines.

While the infantry engagement grows, General of Brigade Viallanes cavalry commits itself to a full charge. All four regiments of French cavalry charge their opposite numbers in the Austrian cavalry in attempt to break through. Though these attacks are not coordinates, the simultaneous attacks by all four regiments of French cavalry creates a massive melee of cavalry troopers just outside of Donauworth.

For the 7th Hussars and 1st Chasseurs, the results are not very good. The Austrian #5 Chevau-léger are able to drive back the 7th Hussars and the fleeing French Hussars disrupt the formation 1st Chasseurs behind them, halting the French cavalry advance and forcing the Chasseurs to reform before they can press on.

The 7th Hussars are Forced to Retreat.
For the 2nd and 12th Chasseurs things are more successful, as under Viallanes direct command the French cavalry is able to force the cavalry of the #7 Chevau-léger to retreat even further with half of the Austrian regiment fleeing the field.

Chasseurs of the 2nd and 12th Regiments Take the Ground that was Occupied by the Withdrawing Austrian Cavalry.

The Severely Battered 7th Chevau-léger Begin to Reform for Another Round with the French Cavalry.
In spite of the mixed results of the cavalry battle going on around his brigades, Feldmarschall-Leutnant von Treuenfels recognizes that he needs to start taking preparation for his troops to withstand the arrival of more French infantry. Since Jellačić’s focus is more on organizing the defenses around Donauworth, von Treuenfels takes initiative and orders the rest of his grenadier brigade to begin deploying into line to meet any new threats. This also includes having more of his 1st Brigade battalions form square to protect themselves from the recently victorious French cavalry.


For General of Division Friant’s 2nd Infantry Division things are not going as well as he had initially hoped. With most of Friant’s 1st Brigade diverted from their attack due to encroaching battalions on their flanks, Friant’s attack force has dwindled down to his exhausted 2nd brigade and the much smaller 3rd Brigade. Additionally due to the packed nature of the battlefield, the 3rd Brigade cannot get into action and can only serve to stand as reserve while the 2nd Brigade makes the initial attempt to clear the town of Austrian defenders.
For Feldmarschall-Leutnant von Brady, the natural defense around Donauworth are making it even harder for the French to get to grips with his troops. The local stone walls and hedges make for natural barriers to hinder any infantry assault as well as providing cover from which his battalions can fire at the oncoming French.


More Battalions from the French 2nd Brigade, 2nd Infantry Division Begin to Engage the Austrian Rear-Guard.
The French attack appears to be faltering when one of the Austrian battalions from the Austrian 2nd Infantry Division suddenly disperses under the fire of the French 33rd Line. This break in the line alleviates some of the pressure on the French 2nd Division 1st Brigade and allows the 33rd Line to continue movement towards the town of Donauworth.
The 2nd Battalion of the #40 Line Reaches its Breaking Point and Disperses Under the Weight of French Fire.
At this point, word comes to Marshal Davout of Marshal Marmont’s victory around Heidenheim. This news tells Davout that he is now free to summon his entire 1st Infantry Division to the engagement around Donauworth.

The French 33rd Line Clears Their Path to Donauworth
No comments:
Post a Comment