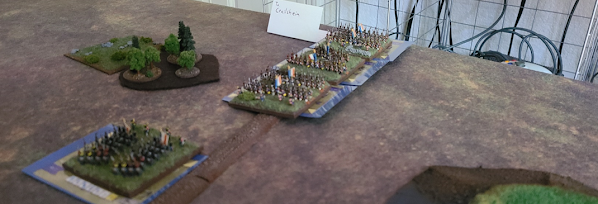
The Battle at Midday: The French Reinforcements Arrive, where is Mack?
Turns 5-8
At the start of turn 5, the French morale is at 6 and the
Austrian moral is at 3. At the end of turn 6, reinforcements can start arriving
for both the Austrians and the French.
Shocked into action by the sudden Austrian counterattack,
Marshal Marmont is finally able to get his corps moving again. However, he is
now forced on to the defensive in the face of Austrians cavalry charges.
Marmont sees that he is in the same situation the Austrian’s had faced earlier
in the battle, with a gap in his lines and Austrian cavalry charging into the
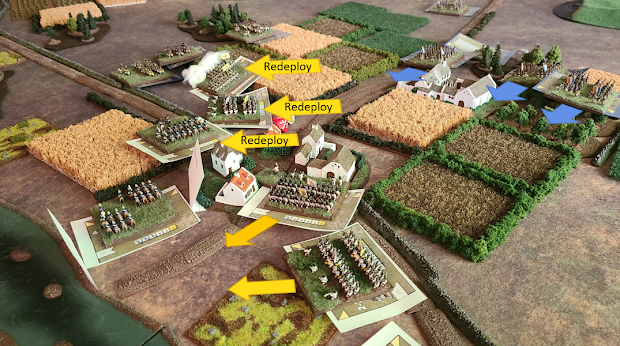
breach. Marmont issues orders instructing his 1st Infantry Division
redeploy and close the gap, the men of the 18th Légère jump to the
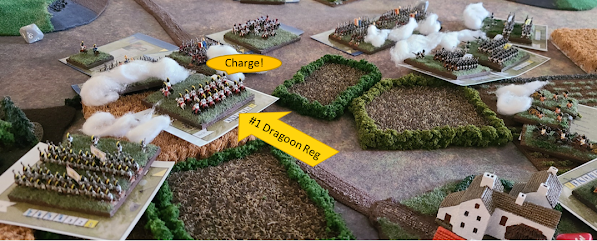
task wheeling about and marching towards the fray. The Batavian cavalry charges
again as nearby French infantry open fire on the Austrian Dragoons. Hoping
against all odds, the Batavian cavalry seek to force back one of the Austrian
Dragoon brigades. This sacrificial charge fails to deal significant damage to
the Austrian Dragoons and breaks the Batavian cavalry as result, dealing a blow
to the French morale. Hopefully, this sacrifice has bought the French II Corps
some time.
Figure 1
– The French II Corps Redeploys to Meet the Austrian Breakthrough.
While the fate of the Batavian cavalry is sealed, the French 6th Hussars begin to withdraw from the field. Thankfully for Marshal Marmont, his remaining brigade of light cavalry (the 8th Chasseurs à Cheval regiment) is able to move up into supporting distance to take over from the 6th Hussars.
Figure 2
– The Batavian Cavalry Breaks in Their Attempt to Force Back the Austrian
Dragoons
Exhausted from their earlier exertions and the ferocity of
the cavalry actions, the engaged elements of the Austrian III Corps now
hesitate to capitalize on their successes. Von Werneck is unable to get his men
to do anything more than fire at the nearby French infantry. By this time in
the battle, the remaining Austrian artillery has exhausted most of its
ammunition supply and will be forced to withdraw from the battle once they run
out. The efforts of the artillery crews are starting to tell as their accuracy
and rate of fire starts to drop off.
Figure 3
– The Austrian III Corps Hesitates as the Remaining Austrian Artillery
Withdraws.
Over by Donauworth, Jellačić joins the farmhouse
garrison adding his skirmishing skills to the 2nd Brigade of the Austrian
I Corps, 1st Infantry Division. Jellačić arrival is just in time to
witness the grenzers of the 1st Brigade of 1st Infantry
Division break and flee from the field opening up the way for the French III
Corps 2nd Infantry Division to assault the farmhouse properly. Jellačići
is not concerned, in spite of this further hit to Austrian morale, as his 2nd
Infantry Division and cavalry are
forcing back the French III Corps 3rd Infantry Division in the
fields to the south causing one of the French brigades to break and flee the
field, resulting in a loss of French morale.
Figure 4
– The Austrian I Corps Assault Continues.
The French III Corps’ light cavalry moves up to offer
support for the remaining beleaguered French infantry as Marshal Davout
coordinates the French response to building Austrian I Corps attack.
Figure 5
- French Light Cavalry Masses for a Charge to Break the Austrian Attack.
While the Austrian’s attack towards the north produces
results, Marshal Marmont is finally able to get his corps back on the
offensive. This new burst of momentum sees Marmont issue orders to the French Cavalry
Reserve, commanding that the as the heavy cavalry is to finish breaking the
Austrian lines and finally take the town of Heidenheim from the
Austrians.
Figure 6
- French Cavalry Reserve on the Move as the French II Corps Regains Their
Momentum.
Von Werneck responds to this new threat by ordering his last
intact infantry division to go on the offensive to try and throw off the French
assault. The grenzers of the 1st Brigade of the Austrian III Corps 3rd
Infantry Division step back into line as the entire division goes on the
offensive. Standing before the advancing Austrian infantry is the ragged lines
of the French II Corps 2nd Infantry Division, already worn out from
the Austrian artillery fire.
Figure 7
- Von Werneck Deploys His Last Reserves, Ordering Forward the 3rd
Infantry Division.
Further north, Marshal Davout’s III Corps’ momentum is
undiminished by the Austrian attacks in the open fields. Davout’s entire light
cavalry division charges into the fray, forcing back the Austrian cavalry that
had so recently inflicted heavy casualties on the French infantry.
Figure 8
– French Light Cavalry Charge and Force Back the Austrian Light Cavalry.
Around the farmhouse, brigades of the French III Corps 2nd
Infantry Division charge the Austrians in the fields on the northern side of
the farmhouse. The French charge forces the Austrians out of field and back
beyond the orchard, the charging infantry having succeeded where volleys of
musket fire had failed to drive off the Austrians.
Figure 9
– The French Move to Flank the Farmhouse Before Assaulting the Prepared
Austrian Defenders as the Austrian Cavalry Withdraws in the South.
Jellačić still has the ability to try and hold the farmhouse
with the one last fresh brigade in his 1st Infantry Division, but he
notices a column of dust coming from the road to Crailsheim, which is
the direction from which the French attack originated. This dust cloud can only
signal one thing, the arrival of fresh French troops. Jellačić orders his troops to abandon their
previous objectives and to start withdrawing towards the river crossing before
they are overwhelmed. Jellačić makes this choice because he does not believe
that his corps has the ability to stop the assault of a much larger French
force. To execute this order, the infantry of the Austrian I Corps 1st
Infantry Division and Cavalry Division begin falling back towards the Danube
River crossing beyond the town of Donauworth while the fresher infantry
of the Austrian I Corps 2nd Infantry Division prepare to deal with
the oncoming French light cavalry. While they execute this withdrawal in the
face of the French attack, the Austrians are able to score another success as
their parting volleys of musket fire cause the last brigade in the French III
Corps 3rd Infantry Division to break and flee the field which causes
damage to the French morale.
Figure 10
– The Austrian I Corps Begin to Withdraw.
In spite of losing another brigade of infantry, French army
morale increases as the French III Corps 1st Infantry Division
finally arrives on the field of battle. They suffer from a little bit of
fatigue due to their forced march to arrive at the battlefield, but this fairly
fresh division constitutes a serious threat to the Austrian army.
Figure 11
- The First French Reinforcements Arrive
Unaware of the arrival of fresh French troops, von Werneck
continues to engage the French II Corps around Heidenheim. Marshal
Marmont’s troops manage to keep up their momentum and unleash volleys of musket
fire into the advancing Austrians. The French II Corps 2nd Infantry
Division manages to form line to face the oncoming Austrian infantry under the
cover of their skirmishing voltigeurs. In a badly timed twist of fate, the
commander of the French Cavalry Reserve hesitates and orders a stop to his
advancing Cuirassier division, depriving Marmont’s exhausted front line troops
of a way to break the deadlock along the road to Heidenheim. Lacking the
anticipated support of the French Cavalry Reserve, Marmont is forced to order
the 8th Chasseur Regiment to charge one of the Austrian Dragoon
brigades. In a show of tremendous bravery, the charge of the 8th
Chasseur Regiment is able to force back the Austrian cavalry, once again
opening a hole in the Austrian lines. At the same time the Austrian III Corps 4th
Infantry Division 3rd Brigade of grenadiers breaks under the
pressure of repeated volleys of musket fire from the hard fighting French III
Corps 1st Infantry Division. The grenadiers of von Werneck’s corps
are not living up to their fame in this battle. This poor performance has a
negative impact of Austrian morale, further weakening Austrian army morale to
the point that it may break at any moment now.
Figure 12
– Converging Lines of Battle as the Austrian and French Forces Make Another Go
at Breaking the Opposing Battle lines.
Managing to survive the breaking of the grenadier brigade,
von Werneck makes his way to the town of Heidenheim. He sends orders
that the #1 Regiment of Dragoons, the Archduke John Regiment, is to charge the
advancing French infantry to hopefully buy more time. Von Werneck is still
intent on fighting, but he is starting to run out of troops with which to throw
at the French. Both the Austrian army and von Werneck need General Mack to
arrive soon with the rest of the Austrian III Corps.
Figure 13
– Austrian Troops Try to hold the Line.
Unfortunately for von Werneck, the Austrian Dragoons are not
able to halt the French advance and the Dragoons are in turn forced to fallback
and regroup. While this is happening, the Austrian III Corps 3rd
Infantry Division unleash their musket volleys on the opposing French line. The
last remaining rounds of artillery ammunition are expended in support of this
attack, which then forces the last Austrian artillery battery to withdraw from
the battle as there is now nothing that they can do to offer further support.
Even with this intense attack, the French infantry manage to stand their ground
and offer up fierce resistance. There is still no sign of General Mack.
Figure 14
– Intense Volley Fire from both Sides.
To the north, Marshal Davout’s troops seem to waver due to
exhaustion at the worst moment possible. Davout rides up and down the lines of
the troops trying to get them into motion through sheer force of will, but to
no avail. Jellačić takes advantage to this lull in battle, to further with draw
his troops, they are almost able reach the river crossing point and escape the
battle.
Figure 15
– The Austrian I Corps Withdrawing Through Donauworth
It is at this moment that things get even worse for the
Austrian army, coming up from the road to Schorndorf (the town from
which Marshal Marmont’s attack originated) arrives the fresh 1st
Dutch Infantry Division (though slightly fatigued from a forced march) along
with the Emperor Napoleon himself. The arrival of the emperor on the field of
battle produces a tremendous boost in French morale, but seems to also distract
the troops of Marmont’s II Corps at the same time. Leading to a result of
Marmont not being able to get his troops in motion to take advantage of the
recent break in Austrian lines. The best that Marmont manages is to get his
troops to keep on firing at the Austrians.
Side note: As part of the game mechanics in Blucher, each
C-in-C and Sub Commander (corps commander) has a special trait/effect that they
can use to represent personal skills or charisma that may have come into play
on a battlefield. Napoleon has the effect of being a “Legend”, which causes the
French army’s morale to be calculated as half of the number of brigades in the
army instead of one third. This means that the French morale after the arrival
of Napoleon and the two new infantry divisions effectively rose to be an 8 at this
moment. Though that morale value may change as the battle continues.
Figure 16
– The Arrival of the Emperor Both Helps and Hinders the French Army.
Figure 17
- More French Reinforcements Arrive Lead by the Emperor Napoleon.
Even with the arrival of the Emperor Napoleon on the field,
von Werneck is still dedicated to holding Heidenheim, in spite of the
fact that his troops are very near the point of breaking. His only orders to
his remaining troops is to hold where they can and pray that General Mack
arrives soon.
Figure 18
– The Austrian Position Looks Bleak.
Even with the odds stacked against them, the Austrians are
still a formidable fighting force, and they show this ability by breaking an
infantry brigade in the French II Corps 2nd Infantry Division. While
the effect is minor at this point, the hole in the French lines is one that
will need to be addressed. French cavalry begins to redeploy even as the
Austrians celebrate this small victory.
Figure 19
- Austrian Musket Volleys Break a French
Brigade.
Receiving word of the arrival
of Napoleon on the battlefield, Marshal Davout is able to finally get his
troops moving again. At the same time that Davout’s men regain their momentum,
word arrives from Napoleon ordering Davout to send his newly arrived 1st
Infantry Division to Heidenheim. Napoleon is already thinking ahead and
is aware of the fact that a faint dust cloud can be seen in the direction of Ulm,
signaling the fact that there is an army of on the march. Davout relays the
order and then turns to the pursuit of the Austrian I Corps.
Realizing that Austrians
around Donauworth are attempting to retreat across the Danube River,
Davout orders his light cavalry to continue their movement to cut across the
road linking Donauworth and Heidenheim. Their goal now is to
flank the retreating Austrians and try and prevent them from reaching the
bridges. At the same time, the French III Corps 2nd Division will
march through the town on Donauworth, taking the town and pinning the
Austrians between the two forces. This entire maneuver relies on hoping that
Jellačić does not realize that the fresh French division he sees is not
actually coming to attack him, because Jellačić’s corps is still a rather
strong force to engage. Davout could really use his corps artillery at this
time. Concentrated artillery fire on withdrawing Austrian infantry would be
devastating.
Figure 20
– French Cavalry Flank the Town of Donauworth as the Austrians Continue to
Retreat.
Jellačić, seeing the French cavalry begin to flank his
withdrawing forces, orders his cavalry and 2nd Infantry Division to redeploy
to block any attacks while his troops attempt to cross the Danube River.
Figure 21
– The Austrian I Corps is Forced to Redeploy to Meet the Flanking French Light Cavalry.


No comments:
Post a Comment